
UTM Code Setup
Please add this information to each Taboola ad campaign. You do this by:
- Click on the campaign you wish to make the change.
- Select the pencil icon for that campaign.

- In the Tracking section, add the following information.
utm_source=taboola&utm_medium=cpc&utm_campaign={campaign_id}&utm_content={campaign_item_id}&utm_term={site_id}&tbclid={click_id}- Once done, click Save button at the bottom of the page. Repeat this process for all other campaigns.
Create Tracking Entries
You must create a Conversion entry for each of the following types:
- Make Purchase – lc_purchase
- Start Checkout – lc_checkout
- To begin, select Tracking from the Taboola main menu.
- Next, select the New Conversion button.
- For Conversion Name, Enter a human readable entire (i.e. LinkClicky – Purchase )
- For Conversion Type, select EVENT.
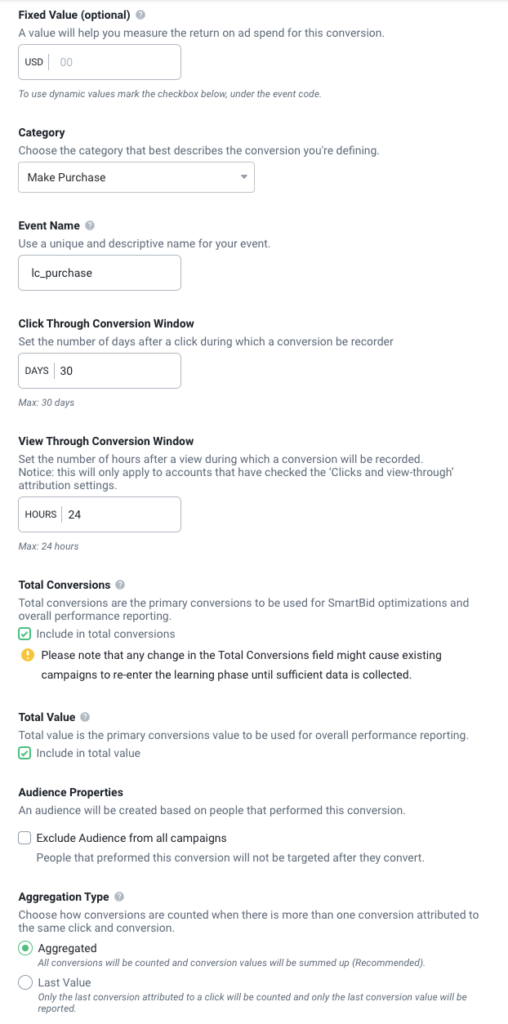
- Leave Fixed Value empty.
- For the Category, select one of the two supported actions: Make Purchase, or Start Checkout.
- For the Event Name, it is recommended to use lc_purchase or lc_checkout. You must then match this in the API setup below.
- For Click Through Conversion Window, leave set to 30 days.
- View Through Conversion Window is also fine at 24 hours.
- Total Conversions – Check off Include in total conversions if this is a Purchase event; otherwise leave blank.
- For Total Value, check off Include in total value only if a Purchase event.
- For Audience Properties, leave blank.
- For Aggregation Type, it is recommended for Purchase events to use Aggregated. For Checkout events use Last Value.
- Ignore the rest of the options and press Create when done.
- Repeat this process for each event you wish to track.
An example configuration for a purchase is listed below.
LinkClicky API Configuration
- To set up your Taboola, please login into your LinkClicky account.
{
    "events": {
        "checkout": {
            "lc_checkout": "[WOOPRA_REPORT_ID]"
        },
        "purchase": {
            "lc_purchase": "[WOOPRA_REPORT_ID]"
        }
    }
}