
If you use Cloudflare, you want to set these options when using LinkClicky.
The subdomain for LinkClicky can be whatever you want. For most uses, go.yourdomain.com is the preferred subdomain.
Configuring DNS
You want to add a DNS A record for the subdomain with proxy enabled.

Do not use a CNAME record when creating your DNS entry. An A record is the preferred method to set up LinkClicky.
Disable Caching
You then want to disable caching for all clicks that go through LinkClicky by setting this option in the Rules -> Page Rules section in the left side menu.
Create a rule similar to the subdomain you use with LinkClicky.
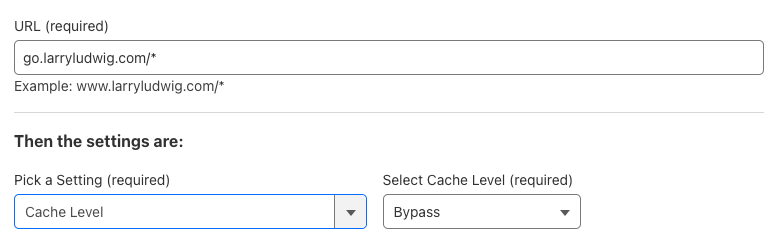
When completed, press the Save and Deploy Page Rule button.
As an added option, some Cloudflare accounts can block caching via the Caching section.
In the left side menu, select Caching -> Caching Rules and create the following rule.
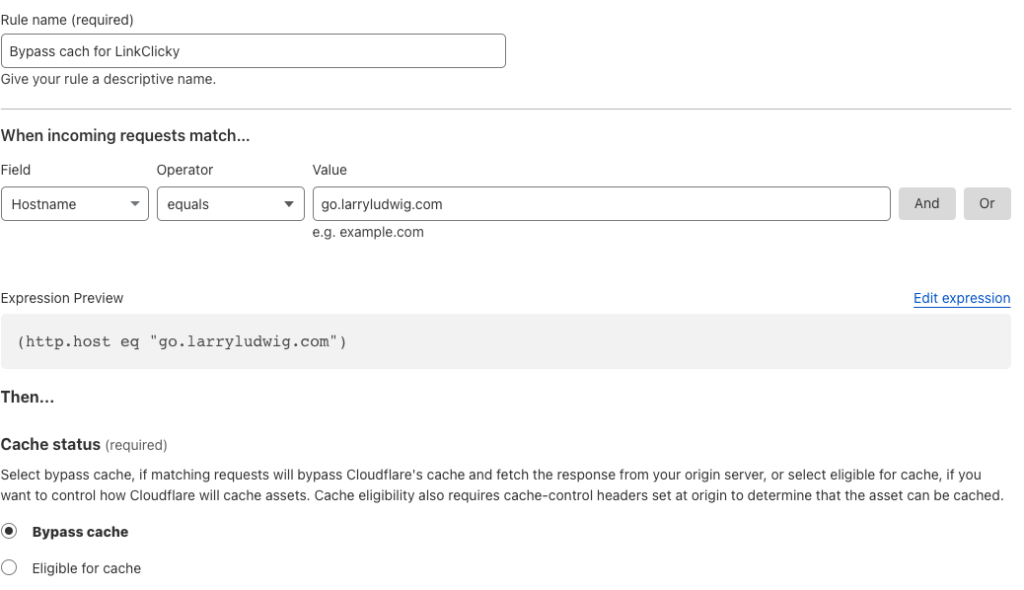
When done, click on the Deploy button.
Enable SSL
If you want proper tracking of referrals from LinkClicky, end-to-end SSL needs to be enabled. If not installed, you should also download and install LinkClicky’s WordPress plugin.
- Login to CloudFlare
- Select the domain name for which the subdomain for LinkClicky is used.
- From the left side menu, select SSL/TLS.
- In the Overview section, You’ll see an option to select your encryption mode.
- Select Flexible, Full, or Full (strict) mode.
GEO IP Tracking
LinkClicky has a built-in GEO IP option via MaxMind. However, if you are using Cloudflare, it is the preferred method. Cloudflare’s data is updated more frequently and loads faster than using MaxMind’s data.
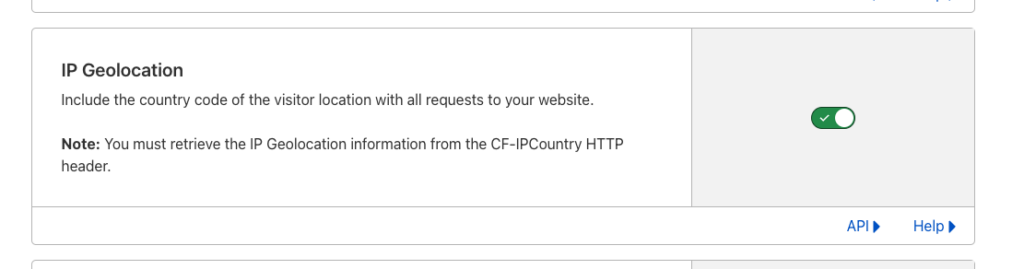
You will need to enable GEO IP tracking within Cloudflare.
- With the selected domain, select Network.
- Under the IP Geolocation section, make sure it is enabled as shown below.
Next, you must enable a Cloudflare rule so more GEO IP data is passed to LinkClicky.
- Under the Rules section, select Transform Rules.
- Next, select the Manage Transforms tab.
- Enable Add visitor location headers option as shown below.
